We will now examine some of the basic commands with respect to online documentation and file browsers/viewers. There are many more beyond these, but what will be presented here will be the essentials.
man
After "ls", "man" is the second command you should be most familier with. "man" is a "Manual Page" viewer for UNIX and is crucial in finding help for unknown or little-known commands and programs.
A "Manual Page" or "man page" is a document that gives an overview and usage information for a given program or command. On an ideally setup UNIX system every command and program will have an associated man page, although this is rarely the case in practice. Most often, your UNIX or Linux system will have the majority of the commands and programs documented in man pages, with a minority of them undocumented. If your UNIX is setup properly, the undocumented programs will return some sort of system-wide "undocumented" man-page to indicate it. On UNIX systems whic are not setup properly, undocumented programs will simply return an error when the man page is requested.
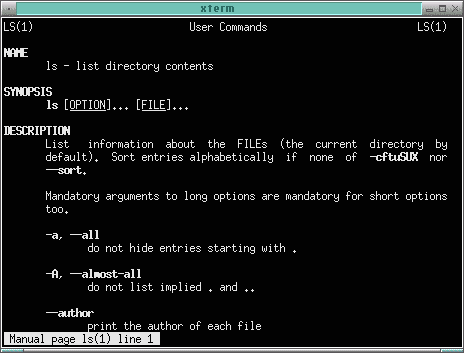
A man page will look roughly like this:
Each man page is broken down into several sections. Some of the more common sections are as follows:
NAME: This lists the name of program or command.
SYNOPSIS: This is the general usage of the program or command.
DESCRIPTION: This is the detailed description of the command.
OPTIONS: This is usually where command line options go.
AUTHORS: This lists who wrote the program and how to contact them.
BUGS: This will contain known bugs or problems with the program.
SEE ALSO: This gives you other locations or man pages to check for references.
While you are viewing a man page, you can press the up and down arrows to navigate, as well as Page Up and Page Down (provided you have keymapping properly set up... some older UNIXes do not do this). You may also use the traditional "SPACE" for page down and "B" for page up (these herald from the days when Page Up and Page Down were not properly mapped). To exit the man page viewer, press "Q" for quit.
To look up a man page on command, simply issue a man command. For example, if I wanted to view the man page for "cp", I would issue:
$ man cp
If I wanted the man page for "man", I would issue:
$ man man
Sometimes, there are multiple man pages for a given command or program. This is usually the case when a particular program also has a programming library interface. For example, "pipe" is both a Postfix MTA program and a C function call for creating pipes under Linux.
Because there may be multiple man pages for a given command or program, the man pages are divided up into different sections, numbered 1-9:
 1   Executable programs or shell commands
 2   System calls (functions provided by the kernel)
 3   Library calls (functions within system libraries)
 4   Special files (usually found in /dev)
 5   File formats and conventions eg /etc/passwd
 6   Games
 7   Miscellaneous (including macro  packages  and  conven-
     tions), e.g. man(7), groff(7)
 8   System administration commands (usually only for root)
 9   Kernel routines [Non standard]
For example, if I wanted to read the man page for "pipe", the Postfix MTA program which is in section #8, I would issue:
$ man 8 pipe
If I wished to read the man page for "pipe", the system C library call, I would issue:
$ man 2 pipe
If, however, you wish to view all man pages for a particular command, you would add the "-a" option:
$ man -a pipe
man has many other options, just like ls, cp, rm, mv, etc. before it. Now that you know the basics of using man, you can discover the rest of their options by viewing their man pages.
info
"info" is an alternative documentation system created by the GNU project. In many ways, it is more robust and versatile than man, however, it is much more complicated to use. As a result, a great deal many UNIX gurus tend to detest it and use it only when absolutely necessary.
The most unfortunate thing about info is that, because it is intimately tied to the GNU project, most GNU utilities tend to favor it for their documentation. Thus, even GNU utilities that have man pages tend to refer you to the "full" documentation available from info.
The main reason info is more robust than man is that, instead of displaying simple, one page documents, info allows documents to be multi-paged and hyperlinked. Thus, you can really go into much more digestible depth in an info document than a man page. However, in order to use info, you must remember the command keystrokes in info.
Navigating info pages
When you first type "info command" for some command, you will generally be presented with a table of contents of some sort indicating the sections of the documentation for this command. Here you can move your cursor with the arrow keys, and select content links with the enter key as if you were browsing a web-site. SPACE takes you to the bottom of a given page while DEL or BACKSPACE returns you to the top. PAGE UP and PAGE DOWN move you and down pages.
Info documents are divided into segments called "nodes". Each page you view is a node. Along the top of the info screen, you may see any of the following regions:
File : Specifies which info file you are reading.
Node : Specifies which node you are currently viewing.
Next : Specifies which node is the next node in the sequence will be viewed.
Prev : This is the previous node in the sequence where you came from (note, this is not like the Back button in a web-browser!)
Up : If you are in a sub-node structure, Up is the master node you will return to if you back out of the sub-nodes.
Pressing "n" will take you to the Next node, "p" will take you to the Previous node, "u" will take you up out of a sub-node structure, and "q" will quit and exit you from the info veiwer.
If you are presented with a menu inside the info page, then pressing "m" will allow you to type all or a portion of the possible menu choices. For example, if I had the following menu:
* Menu:
 * Getting Started::       Getting started using an Info reader.
 * Advanced Info::         Advanced commands within Info.
 * Creating an Info File:: How to make your own Info file.
 * Index::                 An index of topics, commands, and variables.
I could hit "m" and then type "Get" and press TAB and it would complete the "Getting Started" menu selection for me.
You may also see cross-references (which begin with an "*" as well). You can access these in a similar fashion to menu options by pressing "f" and typing all or part of the cross reference.
Info also has many advanced options such as searching, marking, and indexing, but these are beyond the scope of our exploration at this moment. If time permits, you should run through the info tutorial in class. If time does not permit, then it is recommended that you go through the info tutorial before the next class. To run the tutorial, type:
$ info info
at the command line, and then press "h". "h" will bring up the beginning of the tutorial. Simply follow the instructions (it should take about 15 to 30 minutes of your time) until the tutorial is over.
Many UNIX system administrators who do not like, yet have to work with info pages will use one of the various graphical utilities for browsing them. Two of the better ones are khelpcenter and gnome-help. If you have a graphical display, then you may wish to take a look at these two programs.
cat
"cat" means "concatenate files and print on the standard output". cat simply takes whatever file you specify and dumps it to the screen. A good DOS equivalent would be "type". If you want to view a file by pages, then you should use something else like "more" or "less" (described bellow).
more
"more" is a traditional UNIX command for viewing files. If you have a file "bob-payments.txt" and you wish to view the file page-by-page with a "more" prompt at the bottom of each page, then you would issue:
$ more bob-payments.txt
Inside of more, you can press "SPACE" you page down, but you usually will not be able to page back up. You can exit more by pressing "q" for quit.
more has many options, which can be found by reading the man page for it.
less
"less" is a newer UNIX program for viewing files. It has much more functionality than the original more, and is the prefered viewer for modern UNIX system admins. It can be found with most modern Linuxes and UNIXes.
less has the same syntax as more, so if I wanted to view the "readme.txt" file, I would issue:
$ less readme.txt
I could page up and page down with the PAGE UP and PAGE DOWN keys, as well as use the SPACE and B keys for page up/page down as in more. Addtionally, I can scroll up and down with the UP and DOWN keys.
less has many advanced searching features which can be found in the man page for it.
tail
"tail" is a command for viewing or monitoring the ends of files. This can be very useful when you need to see the last bit of an otherwise very large file (for example, system logs can be quite long, and tail makes accessing them much more manageable). By default, tail looks at the last ten (10) lines of a file.
For example, if I wanted to view the last 10 lines of the /var/log/dmesg file (which is a log file detailing certain OS events), I would issue:
$ tail /var/log/dmesg
This might return something like the following:
 sam@rygel:~/work/temp$ tail /var/log/dmesg
 [drm] Initialized radeon 1.1.1 20010405 on minor 0
 XFS mounting filesystem md(9,1)
 Starting XFS recovery on filesystem: md(9,1) (dev: 9/1)
 Ending XFS recovery on filesystem: md(9,1) (dev: 9/1)
 XFS mounting filesystem md(9,2)
 Ending clean XFS mount for filesystem: md(9,2)
 XFS mounting filesystem md(9,3)
 Ending clean XFS mount for filesystem: md(9,3)
 eth0: Setting half-duplex based on auto-negotiated partner ability 0000.
 eth0: Setting half-duplex based on auto-negotiated partner ability 0000.
I can specify a different number of lines using the "-n" option. For example, if I wanted the last 20 lines instead of 10 of /home/hart/foo.txt, I would issue:
$ tail -n 20 /home/hart/foo.txt
Basic Commands : System Information and Control
The following are some of the core commands for viewing system information and control under UNIX. Again, there are many others, but we will just cover the basics for now.
ps
As we will examine in more detail later, all programs running on a UNIX box are called "processes". The "ps" command lists running processes. Running ps by itself will return all the processes associated with your console.
We will examine these fields in more detail when we look more into process management at a later date, but briefly, PID is what is known as the "Process ID" of a given process- each process has one, TTY is the current console the process is running on, TIME is how long the process has run, and CMD is the command which was run to start the process.
If, we wanted to display all of the processes running on a terminal, including those being run by other users, we would use the "a" option. If we wanted to display the process information in a "long" format (that gives us much more information) we would use the "l" option:
$ ps al
ps has many more features that we will examine in greater detail later on. But, for now, this is enough to get us going.
grep
"grep" is a traditional UNIX command for parsing and matching patterns in a file or a given piece of input. It actually has many many uses, which we will cover over the course of this class, but for today, we simply want to get up and running using it to search for patterns. The basic usage for searching for a pattern is
$ grep PATTERN FILE [FILE...]
where PATTERN is the pattern to search for and FILE [FILE...] is the file and optional additional files to search through for the pattern.
As an example, if we wanted to search through the /var/log/dmesg file we looked at above for anything pertaining to "agpgart" (which is a part of the Linux kernel that deals with AGP support under Linux), we could do the following:
 sam@rygel:~$ grep agpgart /var/log/dmesg
 Linux agpgart interface v0.99 (c) Jeff Hartmann
 agpgart: Maximum main memory to use for agp memory: 321M
 agpgart: Detected Via Apollo Pro KT133 chipset
 agpgart: AGP aperture is 64M @ 0xd8000000
If we were using "grep" to search for a pattern across a number of files, we would want it to tell us which files it found that had this pattern. For this, we would use the "-H" option:
$ grep -H agpgart /var/log/dmesg /var/log/syslog
If we wanted to search for patterns listend in some file "FILE", then we could use the "-f" option to specify that file. For example:
$ grep -f patterns.txt /var/log/dmesg
would search "/var/log/dmesg" for all of the patterns listed in "patterns.txt". "patterns.txt" would be read one line at a time and "/var/log/dmesg" would be scanned accordingly.
If there was a potential for the output of grep to produce too much information, we could tell grep to only match a certain number of lines before stopping using the "-m" option. For example, if we wanted to search "bob-car-payments.txt" for the string "dollars", and only wanted to see the first 25 matches, we would type
$ grep -m 20 dollars bob-car-payments.txt
Finally, if we wanted "grep" to ignore case, then we would use the "-i" option